


DIY Corn-Hole Yard Game
- Lazy Day DIY

- Mar 24, 2020
- 5 min read
Updated: Jan 26, 2021
Yard games have become more popular over the last few years. The problem is how expensive some of them can be... so why not build it yourself?

Being stuck at home due to the COVID-19 isolation, I looked for any project to keep me busy. So why my sister asked me to build her a Corn-Hole set for her backyard I jumped at the opportunity to keep buys and have fun with some power tools!
Building this is a great first DIY project. The only challenge I had was cutting the hole in the middle of which I used a Jigsaw and a steady hand. The rest of the cuts were made with a circular saw
This is an awesome project because it could be made with leftover wood and screws you have at home. If not everything can obviously be purchased from your hardware store. I made this during the COVID lockdown so I used scrap wood I had lying around so the sizing isn't what i would have made for an adult set but it was a perfect size for my nieces to play with in their backyard.


Shopping List
24 x Wood Screws 1 1/2 inch long (a small box of wood screws or deck screws will do)
2 x 3 1/2 inch long bolts (1/4 inch)
2 x wing nuts (1/4 inch)
4 x washers (1/4 inch)
1 x 1/2 inch thick plywood
2 x 2x4's 8 ft long (check if you have any pieces of 2x4's lying around first you could use them for the legs - in that case only get 1 2x4x8)
Tools
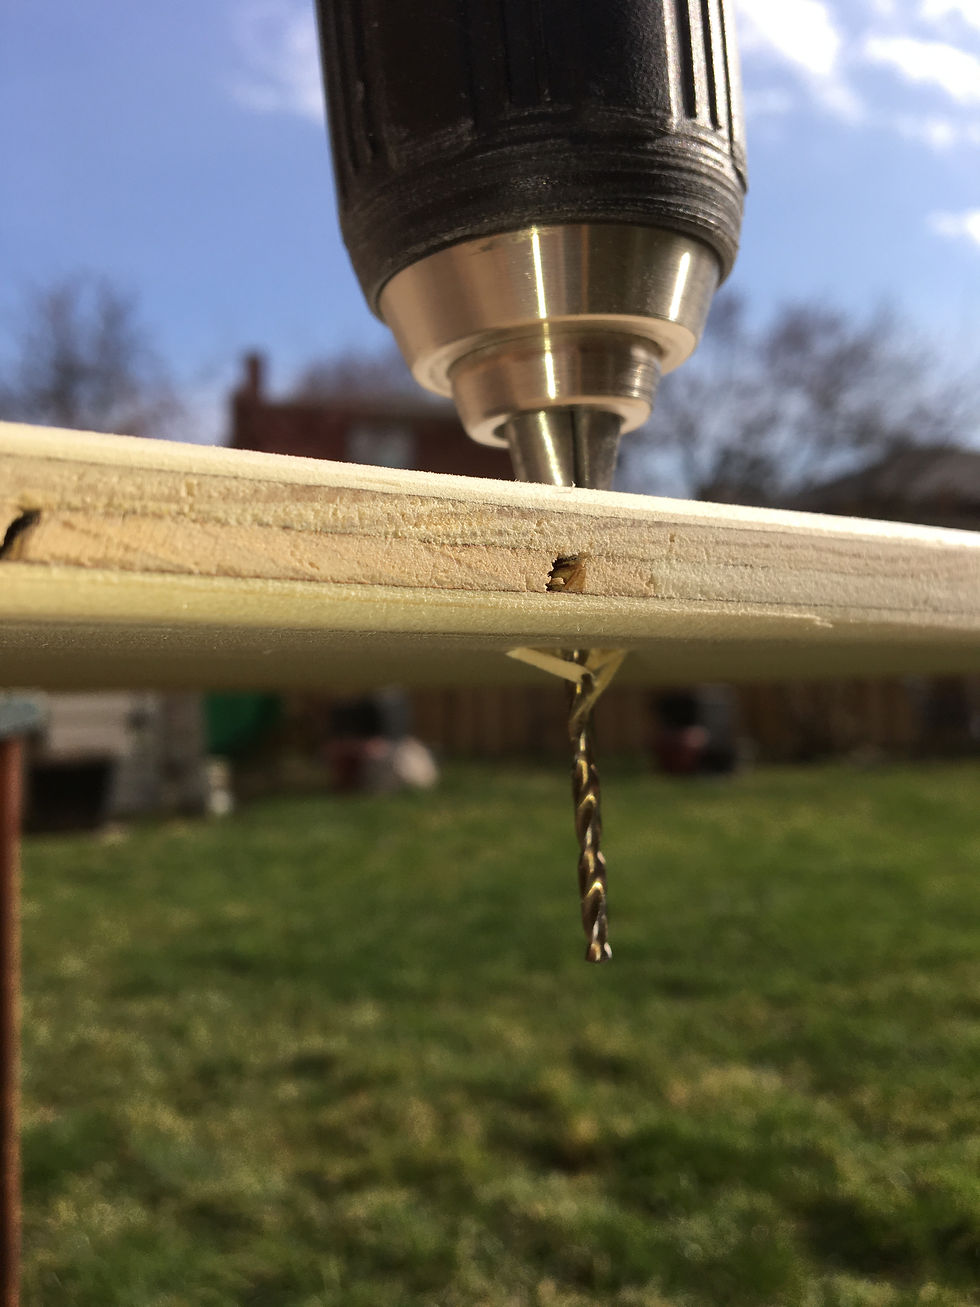
Drill and Drill Bits
Circular Saw
Jigsaw
Table Saw (if you don't have a table saw, ask your hardware store to cut your plywood before you bring it home- it will save you a lot of headaches)
Sander with 80 grit sandpaper (or sand by hand with 80 grit)
Stain or Paint (Optional)
Level, Ruler, Pencil, Tape Measure
Getting Started
First things first, decide on the size of your cornhole. These plans were perfect for a kids size and won't take up too much room for storage, also it wasn't that heavy. The larger you go, the heavier your cornhole will be (just keep that in mind if you want to transport it). Also these plans only make 1 (one) cornhole game, I've seen other plans that make 2 and secure them together to play a complete game, which I may do later.
1. Cut your plywood down to 18 x 24 using your table saw, a circular saw or at your hardware store
2. Cut your 2x4's down. Cut 2 pieces at 24 inches and 2 pieces at 18 inches (these will be the frame of your cornhole, cut your legs out later so you can decide how long you want them to be)
3. Sand everything, especially the plywood and all the cut edges. Trust me this will pay off
4. Cut out your hole. I wanted a 6 inch dimater hole so I found the centre of the top edge and measured down 10 inches from that point. Double checking I had the centre from left to right to start drawing my circle from. You can use a template to draw your circle (either print a circle and cut it out, or use a bowl etc.). I used a push pin at my centre and some thread around my pencil to mark my circle off.
TIP: If using this method, be sure to hold your pencil completely
perpendicular with your plywood because if your pencil is on an
angle as you go around you will make some parts wider and may
end up with an oval shape.


5. See if everything fits - You should have all your pieces cut out for your frame, just piece it together and see if you have to adjust any cuts before screwing anything in. Now's a good time for a water break
6. Screw together your frame starting with pilot holes in your plywood.
TIP: Lay your plywood good side up and place a 2x4 along the edge
to see where the wood will sit. You can mark each hole or just trace
the 2x4 on your plywood and sand off that line when your finished.
You can I made 4 holes in the corners, 2 more along each short edge and 4 more holes along each long edge. Once you made your pilot holes, go ahead a screw your frame to your plywood
7. Secure the corners of your frame. Place 2 screws in each corner. Be mindful of where the other screws are so you don't make a mistake and hit in the process.
8. Measure your legs. (Match the picture below to help you understand what I am describing) Place your frame on a table close to one side and prop it up to the desired height, I made it12 inches (1ft). Then grab your 2x4 and lock it into the corner to the underside of the frame. Since your cornhole is at the desired height, your table will act as the 'grass' so all you have to do is make a mark on the 2x4 where the table top lays and that is the angle you have to cut from your 2x4.


The magical thing about cutting angles is that you only have make that cut ONCE. Both side of the cut will have the same angle. Lock your leg on the inside corner and lay parallel with the other 2x4. You can either measure the hole for the bolt, or clamp and drill through both pieces of wood (this is recommended because measurements could be off a little - mine were lol). Then round your corners with your jig saw and sand down the cuts.
9. Place your bolts through the frame and into your legs. There should be a washer on the bolt on either side of the wood, then screw on your wing nut. The wing nut is great because it holds the legs in place (either open position or closed position).
10. You're DONE! Now either buy some bean bags, or just sew some squares and put a bunch of rice inside. (You can add some scrap material in the bean bags to make them fuller without adding weight - great ideas for the tiny humans).
Below are some lessons I learned by making this from scratch without any plans. Please give me a comment of anything else you learned, or mistakes you made that other can learn from!
Lessons Learned
I wish you well and good luck making your cornhole project! Since I made this over COVID I had to modify it to what i had on hand. So below are some things I learned and some mistakes I made so you know what to avoid.
Buy your bolts at least 3 1/2 inchs long. My bolts were only 3 inches so I had to bury the head of the bolt into the outter 2x4 to give me enough clearance to screw on the wing nut.
Place your legs inside the frame and make sure they are tight with the corner when your drilling the hole for the bolt. If not they could be off when measure the hole and your cornhole won't be level
Don't use thin plywood, 1/2 inch is good. If your making a larger cornhole you may want to use 3/4 inch but don't go thinner because it won't be stable.
Comments